Drawing images and levels with tilesets
Games use images to display their graphics. However, when you want to draw a lot of different images, it can be annoying and inefficient to load each image as a separate resource as you need to wait for every resource to load.
The solution to this is a tileset. A tileset is a single image that contains multiple smaller images, called tiles.
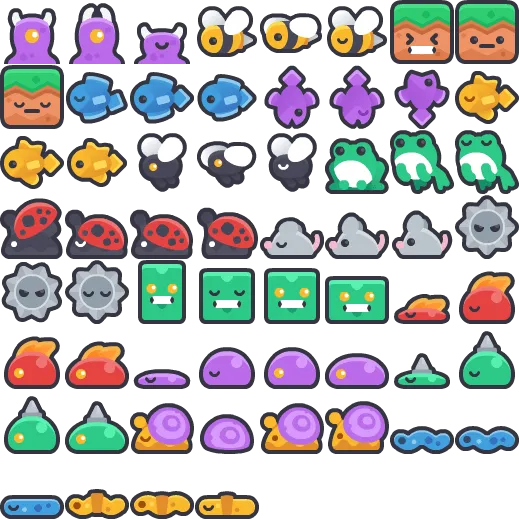
This is an image from kenney.nl that contains multiple tiles of different enemies. Each tile is 64x64 pixels and there is 1px of spacing between tiles with 8 tiles per row, so the entire image is 519x519 pixels (519 = 64 * 8 + 1 * 7).
Instead of loading 64 resources for each enemies and their animation, you can load one image and use Graphics.drawImagePart to draw a specific tile.
However, doing so is inconvenient: you need to calculate the position of each tile in the tileset, might depends on the size of the image, the tile, the spacing, etc…
Tiled and the TSX format
Section titled “Tiled and the TSX format”Tilesets are a way to simplify this process. A tileset is a resource that contains information about the tiles in the image. It is a mapping between tile names and their position and size in the tileset image.
Tileset resources have the .tsx extension and can be created with external level editors like Tiled or manually.
I recommend using Tiled, but you can also create your own .tsx files in a text editor.
A .tsx file is an XML file and looks like this:
<?xml version="1.0" encoding="UTF-8"?>
<tileset version="1.10" tiledversion="1.10.2" name="enemies" tilewidth="64" tileheight="64" tilecount="64" columns="8" spacing="1">
 <image source="enemies_tileset.png" width="519" height="519"/>
 <tile id="0" type="purple_monster"/>
 <tile id="3" type="bee_monster"/>
</tileset>
It defines how to split the tileset image into tiles and can give names or probabilities to tiles.
Tilesets
Section titled “Tilesets”Once you have a tileset and an image, you can combine them to make an ImageWithTileset resource that you can use to draw tiles by name easily.
local Graphics = require("@vectarine/graphics")
local Loader = require("@vectarine/loader")
local Vec = require("@vectarine/vec")
local V2 = Vec.V2

local tileset_image = Loader.loadImage("./textures/enemies_tileset.png", false)
local tileset_data = Loader.loadTileset("./textures/enemies_tileset.tsx")

-- To use an ImageWithTileset, both the image and tileset resource must be ready.
local tileset = tileset_image:withTileset(tileset_data)

-- Draw the "bee_monster" tile.
tileset:drawTile("bee_monster", V2(-0.1, 0.1), V2(0.2, 0.2))
Like drawImage, drawTile has a variant drawTileQuad to draw a quad instead of a rectangle. Moreover, these functions can be used with Fastlists to draw a lot of tiles efficiently.
Tilemaps
Section titled “Tilemaps”Tileset are useful to draw individual tiles, but sometimes, you want to represent a whole level.
To do this, you can use a tilemap. A tilemap is a resource ending in .tmx that is basically a grid of tile ids.
It can be created with Tiled, LDtk or another level editor.
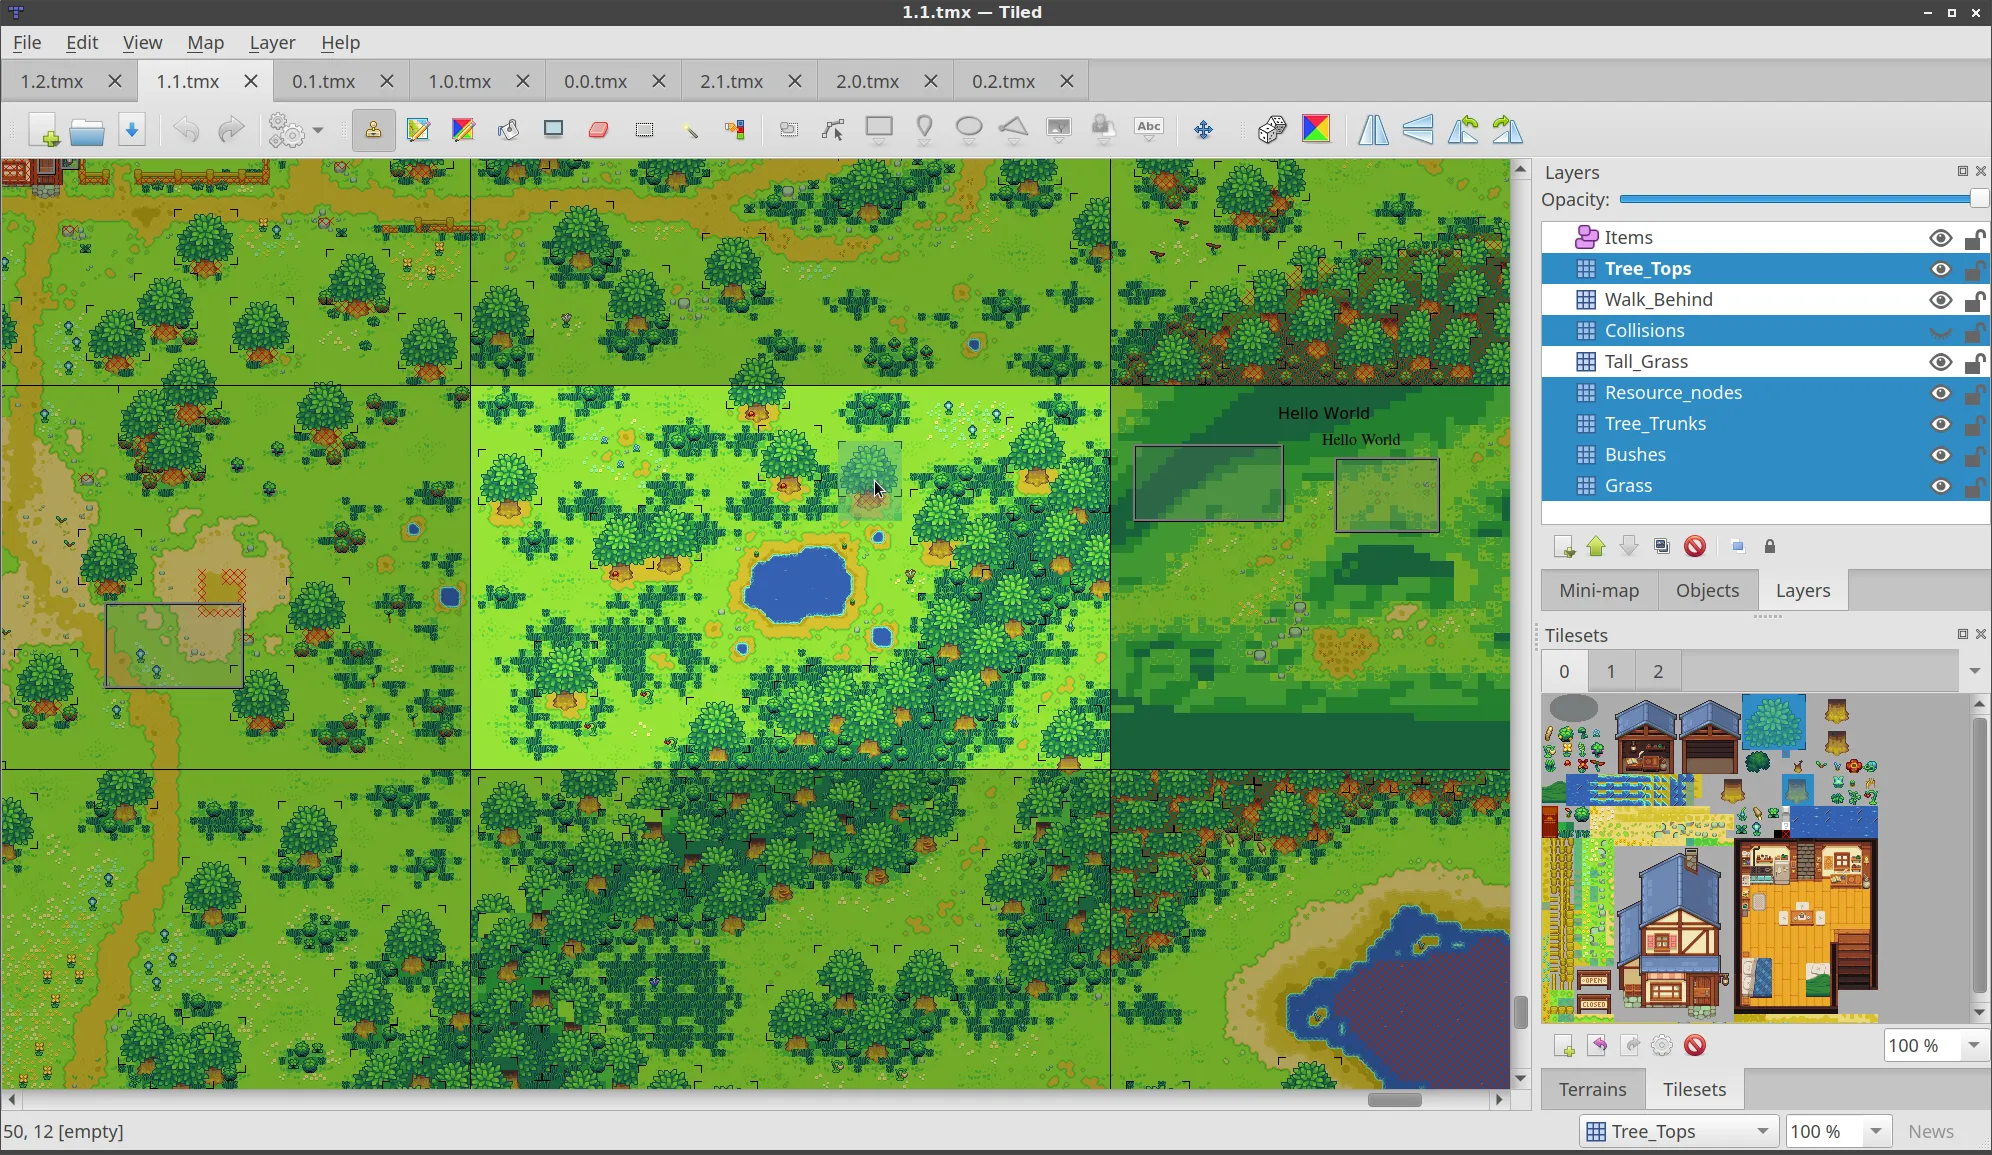
Once you have made your level in your level editor of choice, you can export it to a tmx file and load it in your game.
local Graphics = require("@vectarine/graphics")
local Loader = require("@vectarine/loader")
local Vec = require("@vectarine/vec")

local level_tileset_image = Loader.loadImage("textures/level_tileset.png", false)
local level_tileset_data = Loader.loadTileset("textures/level_tileset.tsx")
local level_tileset = level_tileset_image:withTileset(level_tileset_data)

local tilemap = Loader.loadTilemap("levels/level.tmx")

-- Once a tilemap is loaded, you can get a tile at (x,y) on a specific layer with getTile.
local tileId = tilemap:getTile(0, 1, 2) -- Get the tile on layer 0 at position (x=1, y=2)
-- Draw the tile
level_tileset:drawTile(tileId, Vec.V2(0, 0), Vec.V2(0.1, 0.1))

-- You can draw a whole layer with a loop.
-- You can use `withTransform` to apply transformation to handle translation, rotation and scale of the level.
for x = 0, 10 do
    for y = 0, 10 do
        local tileId = tilemap:getTile(0, x, y)
        level_tileset:drawTile(tileId, Vec.V2(x * 0.1, y * 0.1), Vec.V2(0.1, 0.1))
    end
end
Because by default the coordinate system increases to the right and up, when creating your level in Tiled, try setting the tile render order to “right-up”. You can also just draw the tiles with a negative scale on the y axis to flip them vertically.
Check the Platformer game in the gallery for a complete example of tilemaps and tilesets in action.
Things that are not yet supported
Section titled “Things that are not yet supported”Tilemap .tmx file can contain other informations about tiles like objects (that have non-integer positions), properties, etc.
These are not yet supported in Vectarine. For now, you can:
- Store this information in a separate file with your own format
- Store this information in Lua code
- Read the
.tmxfile as a text resource yourself and parse this information manually
Tileset .tsx file can also contain additional information like probabilities, animations, etc.
You can read this information using the tileset:getTile(tileId) function, but you need to handle yourself how you use this information in your game.
Vectarine tries to be flexible and not push you towards specific game design or art style decisions, so we don’t have a built-in way to randomly draw tiles with probabilities or animate them.
These are things you can easily implement using math.random and by successively drawing different tiles with drawTile every frame.